Menu Bar
![]()
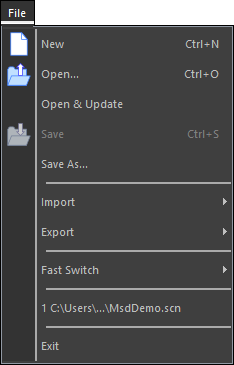
File | New
Shortcut : Ctrl+N ![]()
This menu is used to start a new scene. The program will ask you to save any changes to the current scene if another scene is already open.
File | Open
Shortcut : Ctrl+O ![]()
This menu is used to open an existing scene. You will be presented with the standard file dialog in the 'scenes' directory. After you have selected a scene, the current scene will be closed and the new scene will be opened. If the current scene was changed since the last save you will get the opportunity to save these changes or cancel the open command. Note that a scene can only be opened by one program at any time, so if the scene you selected is already opened by the ShowDesigner, it will fail to open in 3D Visualizer.
If there are any problems, like missing files, or issues with licenses, the report view will open to inform you of these issues
File | Open & Update
The menu is also used to open an existing scene. With Open & Update, the program will replace all fixtures in the scene with the latest available version of each fixture. Afterwards the report view will open and inform you about the replaced fixtures
File | Save
Shortcut : Ctrl+S ![]()
The menu option 'Save' is used to save the current scene. If the current scene was never saved before, you must enter a name for this new scene.
File | Save As
This menu item is used to save the scene with a new name. When you use this option you must select a new name for the scene, the scene is then saved using this name. Any subsequent saves of the scene will be done using this new name.
File | Import and Export
These menu items (and its sub items) offer a way to import/export objects and/or scenes from/to files in a different format, depending on which version of MSD you are using.
Currently, import of OBJ and 3DS is supported in both Lite and Pro versions, and the Pro version has additional support for importing and exporting file in DWG/DXF format.
File | Fast Switch
You can use the sun items of this menu to switch from the current scene to one of the other MSD modules ShowDesigner, Model or Paper (Pro).
File | Recent files
Here you will find a list of recently saved/opened scenes. By selecting one of these scenes you can open the selected scene.
File | Exit
Shortcut : Alt+F4
This option will shut down the program. If there is a scene open and if this scene was changed since the last save, you will be asked whether or not to save these changes or cancel the operation.
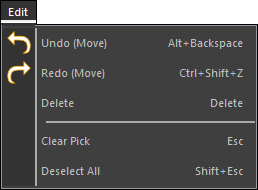
Edit | Undo
Shortcut : Ctrl+Z ![]()
This option will undo the last action (if there is one). The text after 'Undo' indicates the nature of the last action.
Edit | Redo
Shortcut : Ctrl+Y ![]()
This option will redo the last 'undone' action (if there is one). The text after 'Redo' indicates the nature of the last 'undone' action
Edit | Delete
Shortcut : Del
This option will delete the picked object.
Edit | Clear Pick
Shortcut : ESC
This option clears the current pick. Only the 'picked' (red-boxed) item will be unpicked. Any selected items remain 'selected'.
Edit | Deselect All
Shortcut : Shift+ESC
This option clears the selection and pick. The 'selected' (green-boxed) items and the 'picked' (red-boxed)fixtures will be de-selected. Any picked fixture will remain 'picked'.
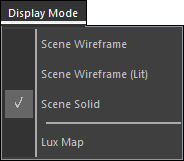
Display Mode | Scene Wireframe
In Wire frame mode, all objects and fixtures in the scene are drawn using only the edges as solid lines with a single color.
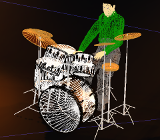
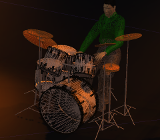
Display Mode | Scene Wireframe (Lit)
This is almost the same as Wireframe mode, but instead of a single color for each edge, the edge will now be colored using the ambient lighting.
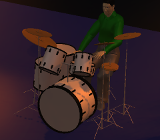
Display Mode | Scene Solid
This is the normal setting in which the scene is drawn as solid objects, shaded using the ambient lighting
Lux Map
This option enables you to activate the false-color overlay, showing you how the different areas in you scene are lit.
When you enable this option, a new section called 'Lux Map' will become available in the Sidebar where you can set the parameters of this false-color overlay mode.
For more information on the Lux Map and its settings, please see: Lux Map
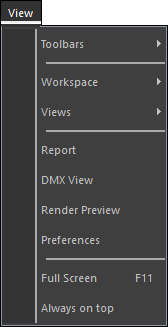
View | Toolbars
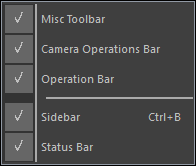
This menu is used to show or hide the different toolbars and sidebar. For an overview of all the buttons in the toolbars you can look at the Toolbars reference, for more information on the sidebar you can check the Sidebar reference
View | Workspace
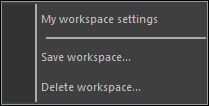
This menu is used to manage workspaces. Above the separator are stored workspaces that you can recall, below the separator are the options to store a workspace or delete one or more stored workspaces.
A workspace can contain the windows layout, the environment settings and/or the preferences of the 3D Visualizer.
View | Views

This menu allows you to quickly select one of the different viewport layouts of the Scene area.
View | Report
'Report' will show the Report Window. For more information about the report, check the Report View section of this manual
View | DMX View
'DMX View' allows you to show/hide a window displaying the incoming DMX values.
View | Render Preview [Pro]
'Render Preview' will open a window where you can make a rendering of the current view and/or create a Render file to render it in the Fast NetRender Client later.
View | Preferences
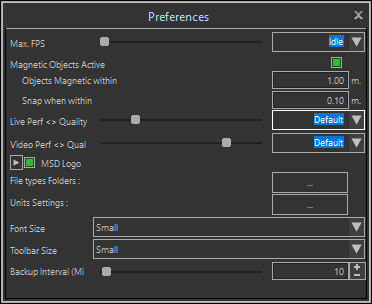
'Preferences' will show a windows with all the preferences that you can set for the 3D Visualizer.
View | Full Screen
'Full Screen' will size the windows to fully use the monitor area it is on.
View | Always on top
'Always on top' will keep the 3D Visualizer 'on top' of other applications, even when it looses focus.
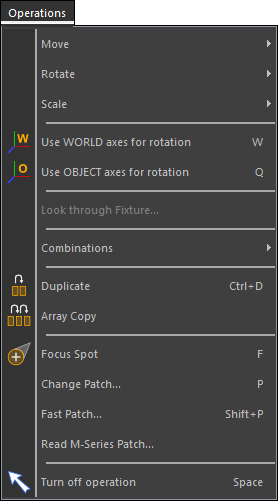
Operations | Move

The Move operations allow you to interactively manipulate the position of fixtures and objects horizontally and/or vertically by clicking on the item that you want to move and dragging the mouse. These operations work best when you have a 2D or isometric camera selected.
Operations | Rotate
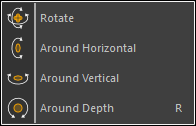
The Rotate operations allow you to interactively manipulate the orientation of an object or fixture by clicking on the item that you want to rotate and dragging the mouse. The first three allows you to rotate around the horizontal and/or vertical axes, while the last rotates around the depth (screen) axis.
Operations | Scale
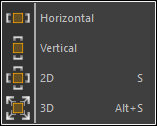
The Scale operations allow you to interactively manipulate the size of an object by clicking on the object that you want to scale and dragging the mouse. The first three allows you to scale along the horizontal and/or vertical axes, while the last does a uniform scale of the whole object.
Operations | Use WORLD axes for rotation
Shortcut : W ![]()
Use the world 'X', 'Y' or 'Z' axis for rotation.
Operations | Use OBJECT axes for rotation
Shortcut : Q ![]()
Use the objects local 'X', 'Y' or 'Z' axis for rotation.
Operations | Combinations
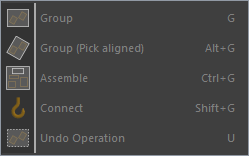
'Combinations' are operations that involve more then one object and/or fixture. The first three items in this menu will take a number of objects/fixtures and combine then to one item. The last menu item will break the combination into its separate objects / fixtures.
Operation | Combine | Group
Shortcut: G ![]()
'Group' allows you to group the selected (green-boxed) and picked (red-boxed) objects together. The resulting group can be treated as a single object from then on. Such a group can always be split again by picking it and selecting the 'Undo Operation' operation.
This operation is only available if there is at least one selected and one picked object, or two selected objects in the scene.
Operation | Combine | Group using Axis
Shortcut: Alt+G ![]()
'Group using Axis' allows you to group the selected and picked objects together, using the orientation of the picked object as the orientation of the resulting group. The resulting group can be treated as a single object from then on. Such a group can always be split again by picking it and selecting the 'Undo Operation' operation. This operation is only available if there is at least one selected and one picked object in the scene.
Operation | Combine | Assemble
Shortcut: Ctrl+G ![]()
'Assemble' is another form of grouping, where the selected objects are connected to the picked object. This picked object will become the 'master' of the assembly. Picking this 'master' will pick the whole assembly just like a group. Picking one of the other objects only selects that part of the assembly, giving you access to the properties of that single part. For instance. if you have a bar and on that bar hang 4 PARs. By selecting the 4 PARs (green boxed), picking the bar (red boxed) and using the assemble operation you can create a 4 bar. If you now pick the bar you can move and rotate the bar including the PARs, but by picking a single PAR you can still change it's color without having to undo the combination
Operation | Combine | Connect
Shortcut: Shift+G ![]()
'Connect' is used with dynamic objects like hoists. The selected objects are connected to the picked connector object. After the selected objects are connected to the connector, they will follow the changes that are made by the dynamic object. A connection can be made undone with the Undo Operation function.
Operation | Combine | Undo Operation
Shortcut: U ![]()
'Undo Operation' allows you to split a group or assembly into its components. It can also be used to disconnect an object from a connector.
When the picked object is a connector then this operation will disconnect all objects and fixtures that were connected to it.
Operations | Focus Spot
![]()
This operation can be used to quickly point a number of fixtures to a single point. The operation can also be used to point the fixtures along a line or a circle.
After you select this operation, you can add fixtures to the collection by clicking on a fixture. If a fixture is part of the group blue box will be drawn around it. If you click on a fixture that is already part of the collection, it will be removed from the collection.
A section in the sidebar will also become visible, this section has some controls that allow you to change some settings of the operation.
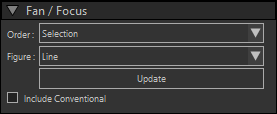
A click with the left mouse button somewhere else in the scene area will cause all fixtures in the group to be aimed at that point. If you hold down the left mouse button, you can drag this point. If you press the 'F' key while you are holding down the left mouse button the operation goes into fan mode. In this mode all fixtures in the group are pointed along a figure. The type of figure depends on the settings in the side bar. By further dragging the mouse you can change the figure. Instead of clicking the mouse button and pressing the 'F' key to start the fan mode, you can also use the double click to start the fan mode.
The controls in the sidebar let you change the order in which the fixtures are fanned, or change the kind of figure that is being used for the fan operation. After you change one of these settings, you can use the Update button to recalculate the fan with the new settings.
The DMX changes required to point the fixtures to the correct location will be transmitted as DMX values. That is if Follow DMX is turned on and the selected connection allows sending of DMX values (back to the console).
The last setting lets you include conventional fixtures, this will make it easier to spread a group of conventional lights
Operations | Change Patch...
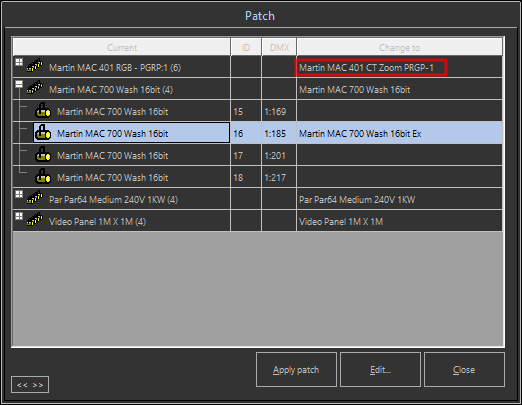
This options open a windows that allows you to change fixtures out for other fixtures, or another mode.
When the window open, you will get an overview of each type of fixture that is used in your scene.
You can expand a type to show each individual fixture in the scene of that type.
You can select a fixture type (selecting all fixtures of that type), or individual fixtures and use the 'Edit...' button to select what fixture type should replace it/them. After selecting the fixture you return to this window, and it will show your choice in the right column (Change to). When you are done making changes, you can Apply the new patch (or Close the windows without applying the patch).
Operations | Fast Patch...
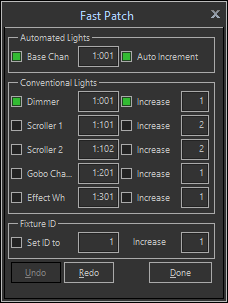
This window allow you to change the patch-address of fixtures (and accessories) and/or the fixture IDs,
by setting the start-values and specifying how the values should increment.
When the window opens, all fixtures will get a blue 'selection' box.
When you start clicking on fixtures, the fixtures will get a new patch-address and/or ID, the blue box will disappear, and the values in the window will be incremented, so that you can click on the next fixture, and so on.
Operations | Read M-Series Patch...
This option allows you to import a patch file from the M-Series consoles, so that you can quickly start to create a scene whith a matching path with the console.
Operations | Turn off operation
Shortcut : Spacebar ![]()
Stops any active operations, and de selects the current operation.
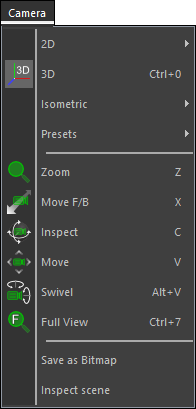
The items in this menu all relate to how the scene is viewed. For more information please check the Cameras section of this manual
Camera | 2D
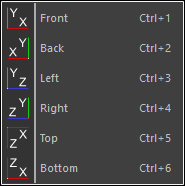
These menu items all select one of the predefined 2D orthographic camera settings. For more information please check the Cameras section of this manual
Camera | 3D
Shortcut : Ctrl+0 ![]()
This menu item will switch the camera to a perspective view setting. For more information please check the Cameras section of this manual
Camera | Isometric
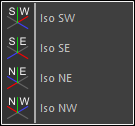
These menu items all select one of the predefined isometric camera settings. For more information please check the Cameras section of this manual
Camera | Presets
'Presets' will show a menu where you can select one of the stored camera settings of the current scene, and also 2 options to store the current camera as a preset or delete one or more presets.. For more information please check the Cameras section of this manual
Camera | Zoom
Shortcut : Z ![]()
'Zoom' selects the zoom operation of the camera.
Camera | Move F/B
Shortcut : X ![]()
Move F/B selects the move forward/back operation of the camera.
Camera | Inspect
Shortcut : C ![]()
'Inspect' selects the inspect operation of the camera.
Camera | Move
Shortcut : V ![]()
'Move' selects the move operation of the camera.
Camera | Swivel
Shortcut : Alt+V ![]()
'Swivel' selects the swivel operation of the camera.
Camera | Full View
Shortcut : Ctrl+7 ![]()
'Full View' will reposition and set the camera to get a view of the full scene.
For more information on the camera operations, please check the Camera operation section of this manual.
Camera | Save as Bitmap
Saves the view (with all the viewports) as Bitmap.
Camera | Inspect scene
This option allows a simple 'inspection' of the scene by rotating the camera around the scene.
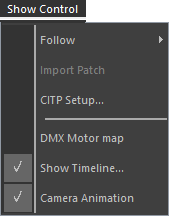
The show control menu has items that deal with DMX, DMX contrrol of Motors (Dymanic Objects), Setup of DMX connections and the creation of a presentation.
Show Control | Follow
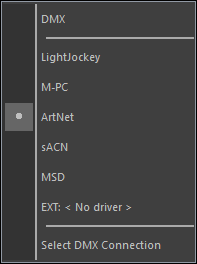
The 'Follow' menu shows you the options needed for DMX input.
The first DMX option enables/disables DMX input altogether, a 'master switch'.
(You can see the status of this switch in the statusbar, either as OFF ![]() or ON with one of the ON indicators:
or ON with one of the ON indicators: ![]() /
/ ![]() /
/ ![]() .
.
The first of the ON indicators means that DMX in is enabled, but no connection has been made yet.
The second means that a connection is enabled, and the third means that incoming DMX value changes have been detected.
The next section of the menu indicate which driver is currently selected, which can be the MSD driver (for inter module communication), one of the build-in drivers, or the external driver EXT.
The external driver can be one of several installed drivers, and it can be selected using the 'Select DMX Connection' option in the menu.
Show Control | Import Patch
If the DMX Connection supports it, you can read the import the patch using the DMX Connection.
Show Control | DMX Motor map
'DMX Motor map' will display a window where you can setup a connection between DMX channel values and motor values.
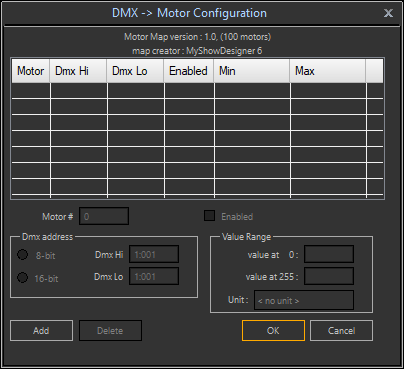
This allows you to simulate motor values with DMX channels. Normally these motor values are set by separate control equipment that controls hoists and other mechanical parts of the show. By simulating these values with DMX, you can use the lighting desk to control the dynamic elements in the visualizer.
You can specify which motor (number) you want to control using DMX, specify if tou want to control it with 8-bit or 16-bit resolution (1 or 2 DMX channels), and what values for the motor should be used for the DMX range by specifying its min. and max. motor values for the min. and max. DMX values.
Show Control | Show Timeline
This menu item will display the Show Timeline window. The Show Timeline can be used to create a presentation and a video. For more information please check the Creating a Presentation section of this manual
Show Control | Camera Animation
'Camera Animation' can be used to toggle the camera animation during the playback of a show. When it is turned of the camera settings will not change during playback. When it is turned on, the camera settings will change according to the camera animation defined in the current scene.
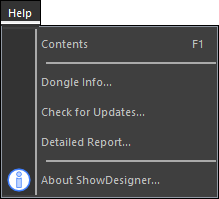
Help | Contents
'Contents' will open a window with the online Help file.
Help | Dongle Info...
'Dongle Info' will show the following window.
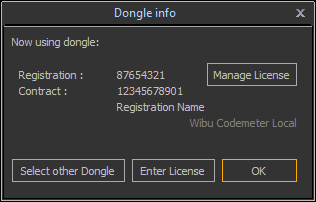
This will give information about the dongle that is being used by the program, and also allows you to select a different dongle.
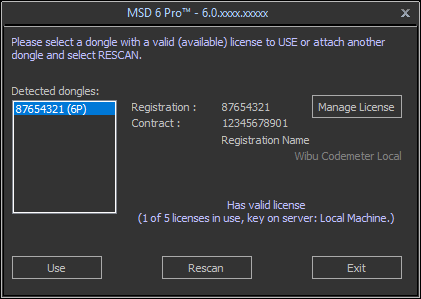
If there are more than 1 licenses available (either connected or on a network), you can use the 'Select other Dongle' button to open a window where you can see which licenses are available and valid, and choose which license you want to use.
Help | Check for Updates...
This option allows you to set the interval for the program to check for updates.
If during such a check a newer version is found, the notification will be shown.
Help | About ShowDesigner ![]()
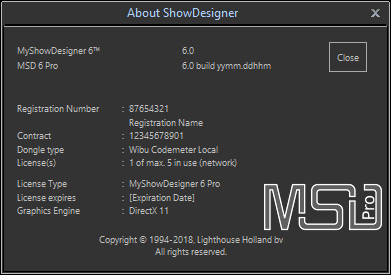
This option will display the following window in which you can get information about the program.
