Creating and using object layers
Once you have inserted your first object, you should put it on a layer. Then for every subsequent object, put it on a layer as you go. This will not only save you time, but a huge headache later on. Here is how you create a layer and put an object on it:
· Go into the properties of your object and click on Layers

· Under the Layers column, click on a blank layer.
· Type in a name for your layer, e.g. Floor, stage or ceiling
· Click on the box to the right of your name, a tick should appear
· Click OK
Every time you put an object in, you should put it on a layer straight away. Then put other objects that are located in the same area on the same layer. For example, put your stage, staging blocks, risers, stairs, set, musical instruments and people all on one layer called stage. Create new layers for different areas, for example create another layer for your trussing or lighting bars. You can then split it down even further into front of house lighting, front stage lighting, rear stage lighting, side lighting etc.
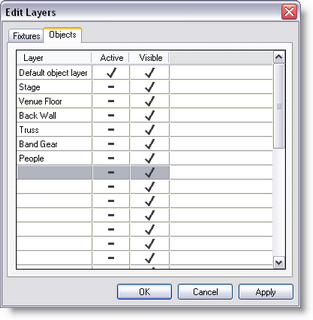
Once you have set all this up, you can then turn off the layers you don't want to see at any one time. Simply click on Object Layers![]() or press Ctrl + L, this will open the layer control window. In the visible column you can turn on and off which layers are visible.
or press Ctrl + L, this will open the layer control window. In the visible column you can turn on and off which layers are visible.
You can also use this window to change the current active layer. When you insert a new object it will automatically be placed on the current active layer, saving you time and effort.
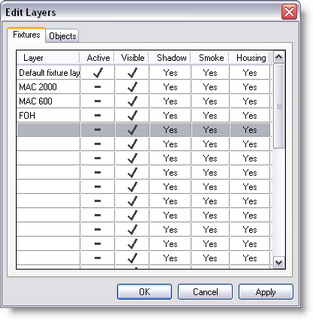
Press ![]() to access the Fixture Layer control directly
to access the Fixture Layer control directly
Note: More layers option exists in the 3d Visualizer module